

If you have a website or a blog, chances are it is powered by WordPress. How do I know? Because WordPress is the most popular CMS that powers a whopping 40% of all websites. It is open-source, free, and extremely easy to use. You can create content in its editor or upload content from an external file. How to upload content to WordPress or how to use its editor, let’s find out.
How to Upload Content to WordPress
There are several ways to add content to your WordPress website:
- Write in a word processor and copy-paste on WordPress
- Write directly in WordPress editor
- Use Google Docs to upload content with images.
We will cover these three methods in detail but first, let me tell you something. You can’t upload content or a document as a blog post or WordPress page. The content you upload as a file or image goes to your Media Library:
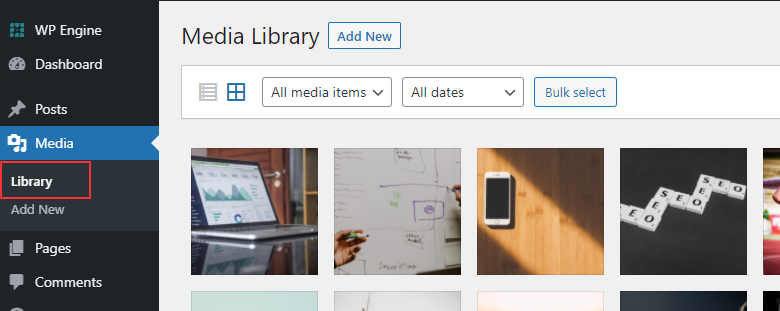
Media is where you can upload images, videos, and any type of file. This method can’t be used to upload text as a blog post or page.
You can upload content to WordPress in the following ways:
1. Write in a Word Processor and Copy to WordPress
This is the easiest way to create content and upload it to WordPress. Use any word processor to type text such as:
- Microsoft Word
- OpenDocument
- Apple Pages
Once you have typed the text, copy it and paste it into the WordPress editor. Pasting content directly from a document will retain formatting including heading tags, bullets, lists, hyperlinks, etc. However, images aren’t copy-pasted directly. You’ll need to insert images manually by uploading them to the media library.
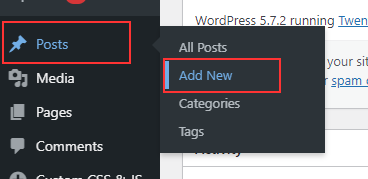
Once you have the text ready, open WordPress and click Posts > Add New to open the editor:
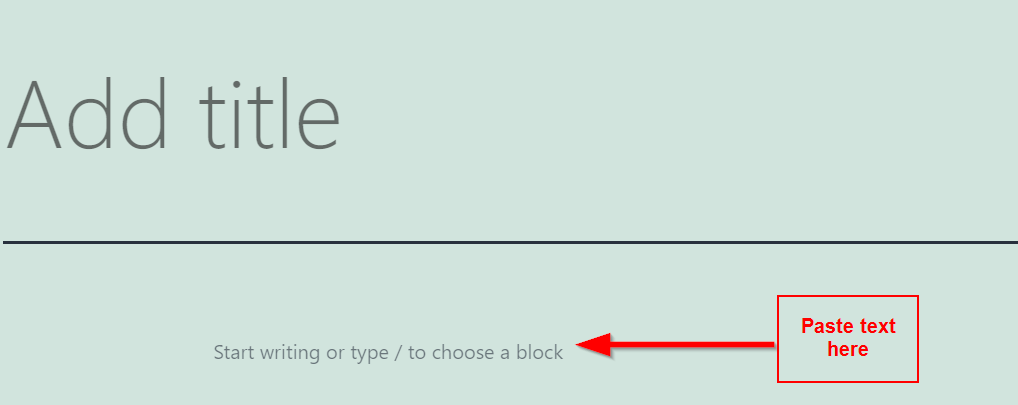
Paste title in the Add title section and text in the area below. The content will be automatically converted into relevant blocks (e.g., headings, paragraphs, etc.) with all the formatting:
You’ll have your post ready except for images and/or video. Here is how to add images to a new post.
Click the + button to add a new block in the WordPress editor and select Image:
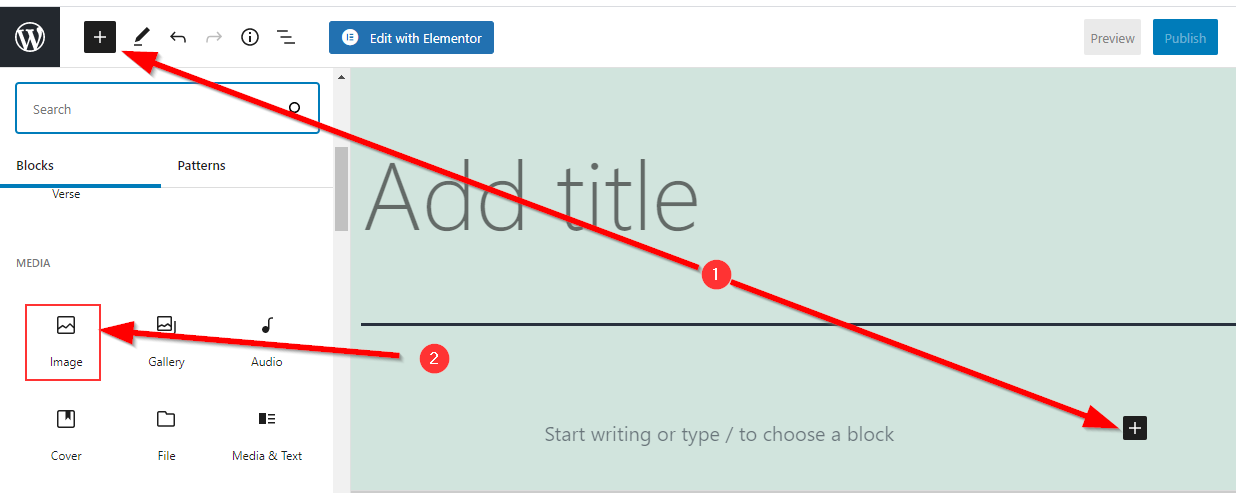
An image block will be added that looks like this:
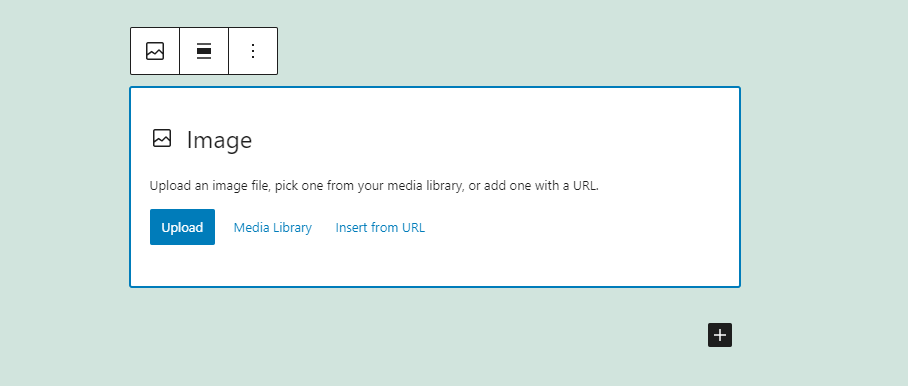
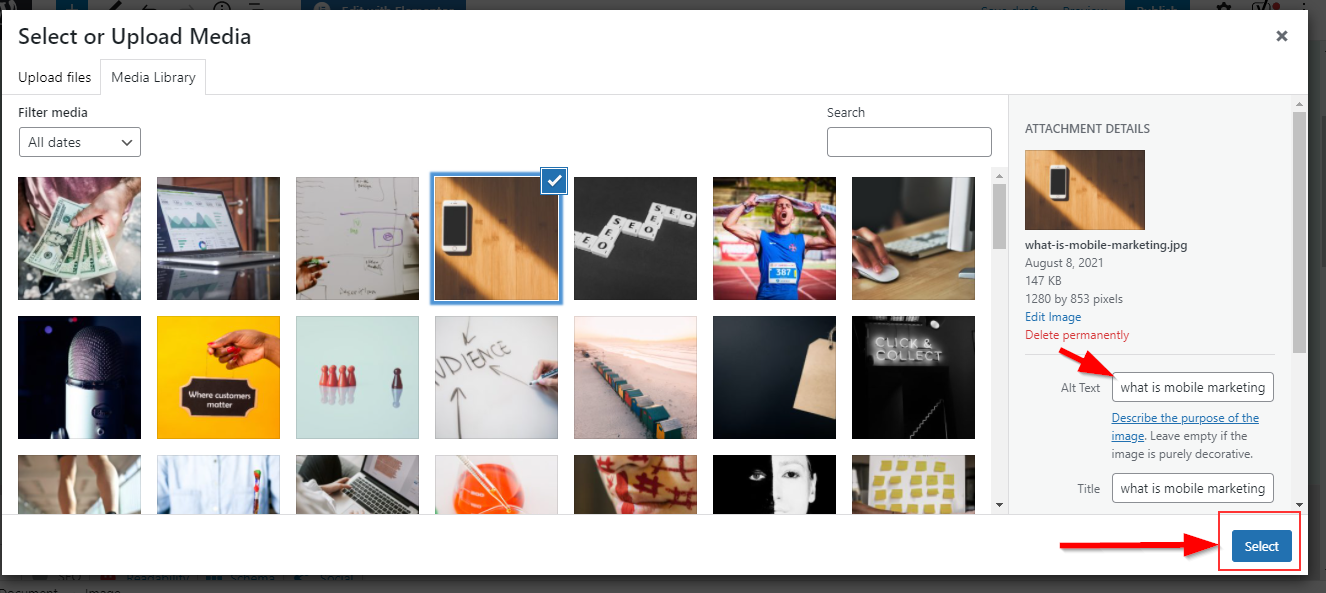
Click Upload to add an image file. If you have already uploaded your image, click Media Library to add the relevant image. Select an image file from your device to upload it. Add relevant alt text and click Insert to add the image to your post:
Follow the same procedure to add more images.
2. Write in WordPress Editor
If you aren’t a fan of traditional word processors or if you prefer working online, writing content directly in WordPress is your best bet.
The formatting features are limited but that’s what you get even if you copy-paste content from a word processor. All you have to do is create a new post or page and start typing:

Your article will be saved as a draft automatically. WordPress has a smart auto-save feature that saves all the changes automatically. Besides, you can insert relevant blogs to make the content user-friendly. For example, you can add lists, quotes, buttons, separators, tables, and much more.
Click the add symbol to insert a new blog:

You can also use the search bar to find relevant blocks for your content.
When you copy-paste content from a word processor, the content is converted into relevant blocks automatically. And I have noticed that people tend to avoid using blocks or adding additional blocks once they have pasted the content.
One benefit of directly typing content in WordPress is that you get a chance to explore all the features and blocks. You might end up using some cool features that other bloggers (or most of them) don’t use too often.
However, it all comes down to how comfortable you are typing text in the editor. Content writers have different preferences and they usually stick with a single word processor of their choice. If this is the case with you, WordPress editor might not be a decent option for you.
3. Google Docs
This is the method I use to upload content to WordPress and there is a reason why I love it.
When you upload content from a conventional word processor (like Microsoft Word) to WordPress, images don’t copy. You’ll only see text in WordPress.
Imagine you have a 10,000 words guide with 50+ images that you move from Microsoft Word to WordPress. You’ll have to insert all the images manually by uploading them to the Media Library. It gets too tedious.
Thanks to Google Docs that copies all the images to WordPress. Take text and images from Google Docs, paste in the WordPress Editor, and it will be ready to publish. No need to add images manually.
I’m not a fan of Google Docs so what I do is I write content in Microsoft Word and then open the document in Google Docs. And then copy it from Google Docs with all the images.
So, you don’t have to necessarily type content in Google Docs. Use your favorite word processor and open it in Google Docs for copying text with images.
This method works best when you have a lot of images in the content.
The Best Way to Upload Content to WordPress
So, what’s the best way to upload content to WordPress?
It depends on your preferences.
If you use a lot of images in content, use Google Docs to upload content. If you are a fan of formatting and love using different blocks, typing in the WordPress editor should be your preference.
However, if you prefer using your favorite word processor and don’t feel comfortable typing in any other tool, stick with your favorite. You can copy-paste content from anywhere to WordPress.
WordPress is flexible and growing rapidly. It is evolving quickly and new features are added every now and then. The procedure to upload content to WordPress might change in the coming days.
You never know.
Featured Image: Pexels